I wrote something similar last year for iOS17 and most people said this was really helpful, so I have updated this for iOS18, nothing much has changed in terms of Camera settings between both version of iOS.
I am not claiming to be a great photographer (my imposter syndrome ensures that); changing a few settings on your iPhone will give you more control over your camera and assist you in being a better photographer.
[If you would rather see this guide as images you can view it here, or if you want this as a PDF you can buy it here.]
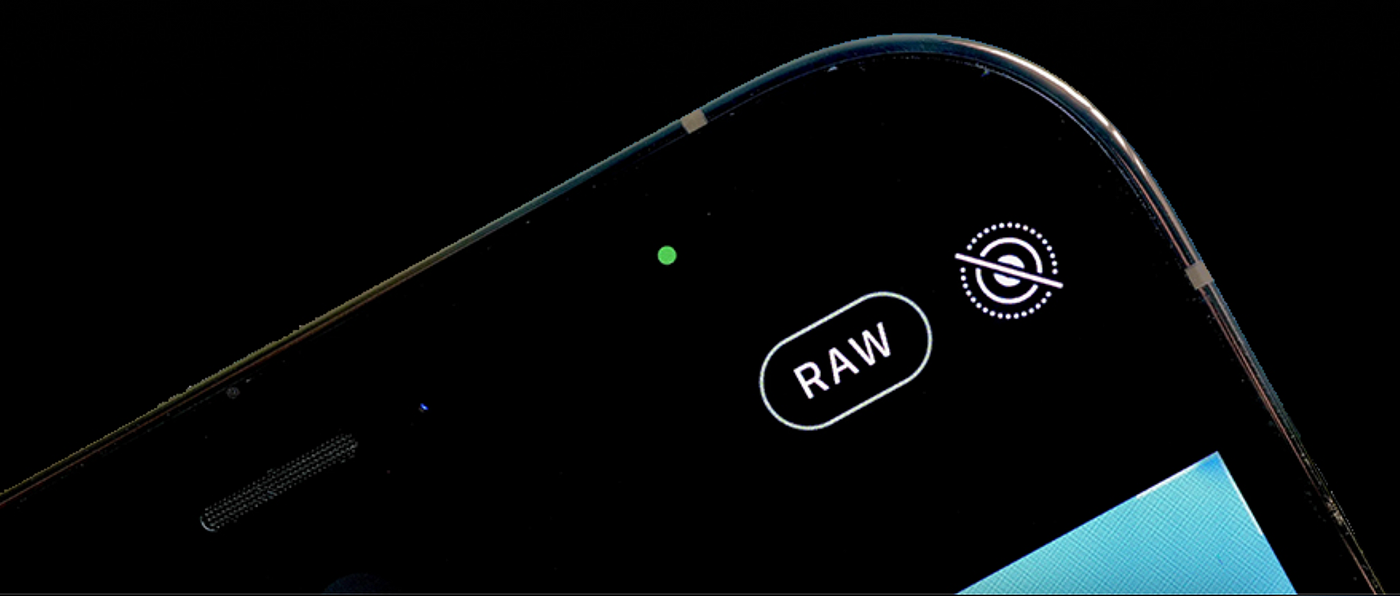
1. Enable ProRAW
If you have an iPhone 12 Pro or later you can capture a RAW image from the camera app.
A RAW image is an original image captured from the sensor on the iPhone with minimal to no processing.
This gives you much more detail on an image & gives you more bandwith when you edit photos.
To enable ProRaw: Open the Settings App, go to the Camera section. open the Formats menu and then enable Apple ProRaw and Resolution Control.
On the iPhone 14, 15, and 16 Pro’s you can choose your ProRAW photos to save at 12 Megapixels or at 48 Megapixels.
To use ProRaw: You should now see the RAW option on the top right corner when you use the Camera app
2. Enable the Grid
Grid lines will help you frame your shots when you take them. This can help to get your horizons in level and assist in getting your rule of thirds right.
To turn on the grid: Open the Settings app, go to the Camera section and turn on the Grid toggle.
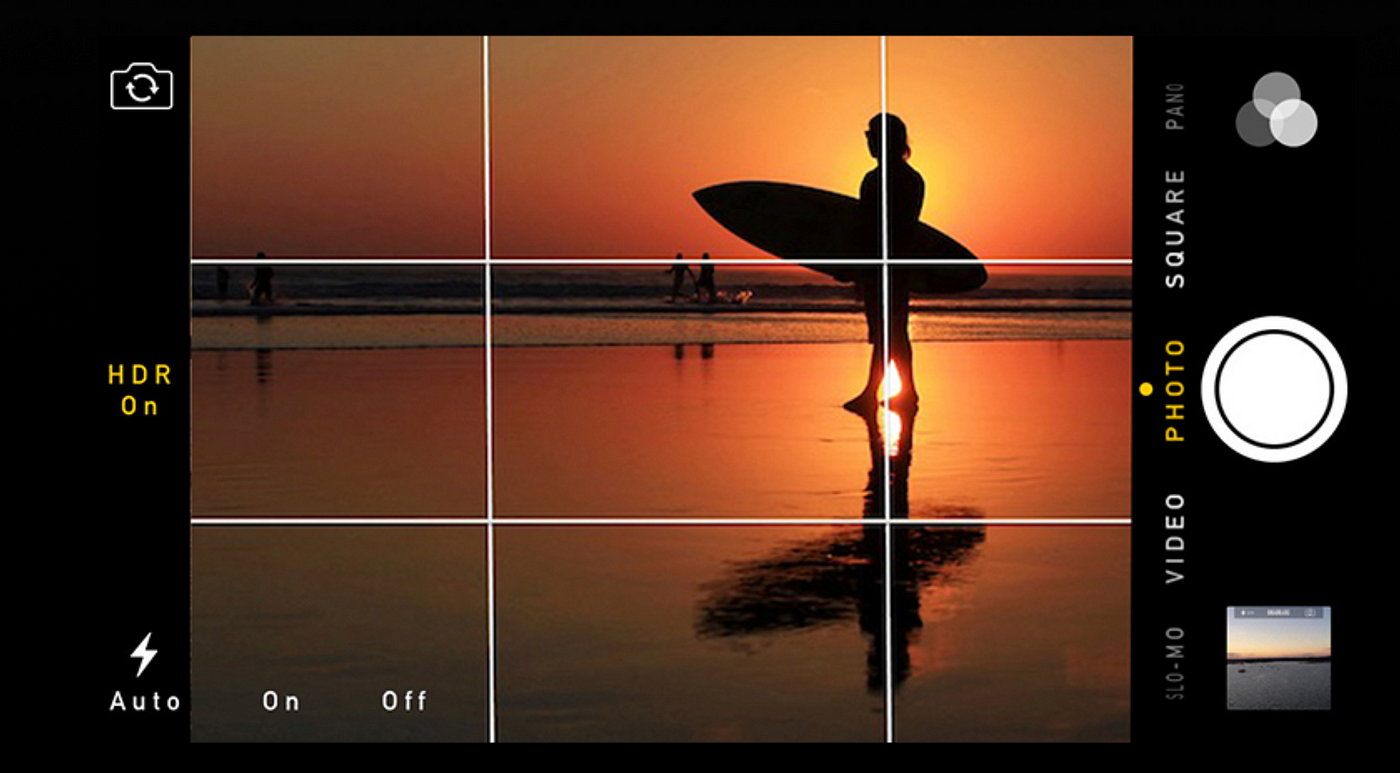
3. Enable the Level
Just like the Grid lines, the level indicator on the middle of the viewfinder will help you align the shots and ensure they are straight.
The level will work on both portrait and landscape orientations, to turn on the Grid: Open the Settings app, go to the Camera section, turn on the Level toggle.
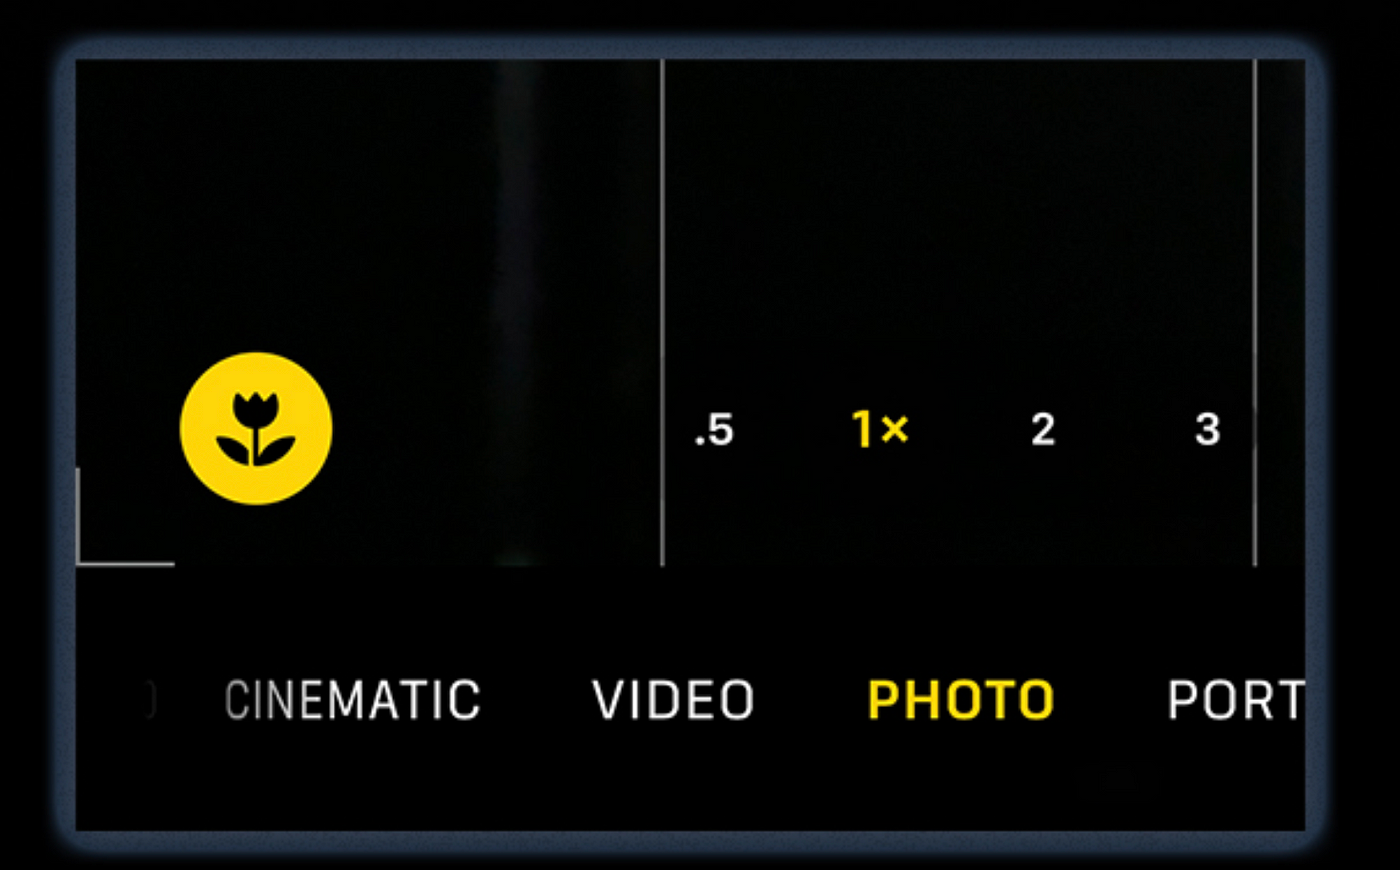
4. Macro Control
The iPhone 13 and 14 Pro models let you shoot in macro thanks to the ultra wide lens. This turns on automatically when you are really close to an object but this can get in the way of your photoshoots.
Go to Settings, then go Camera and turn on Macro Control. This will give you a button on the Camera Ul to turn it off when shooting.
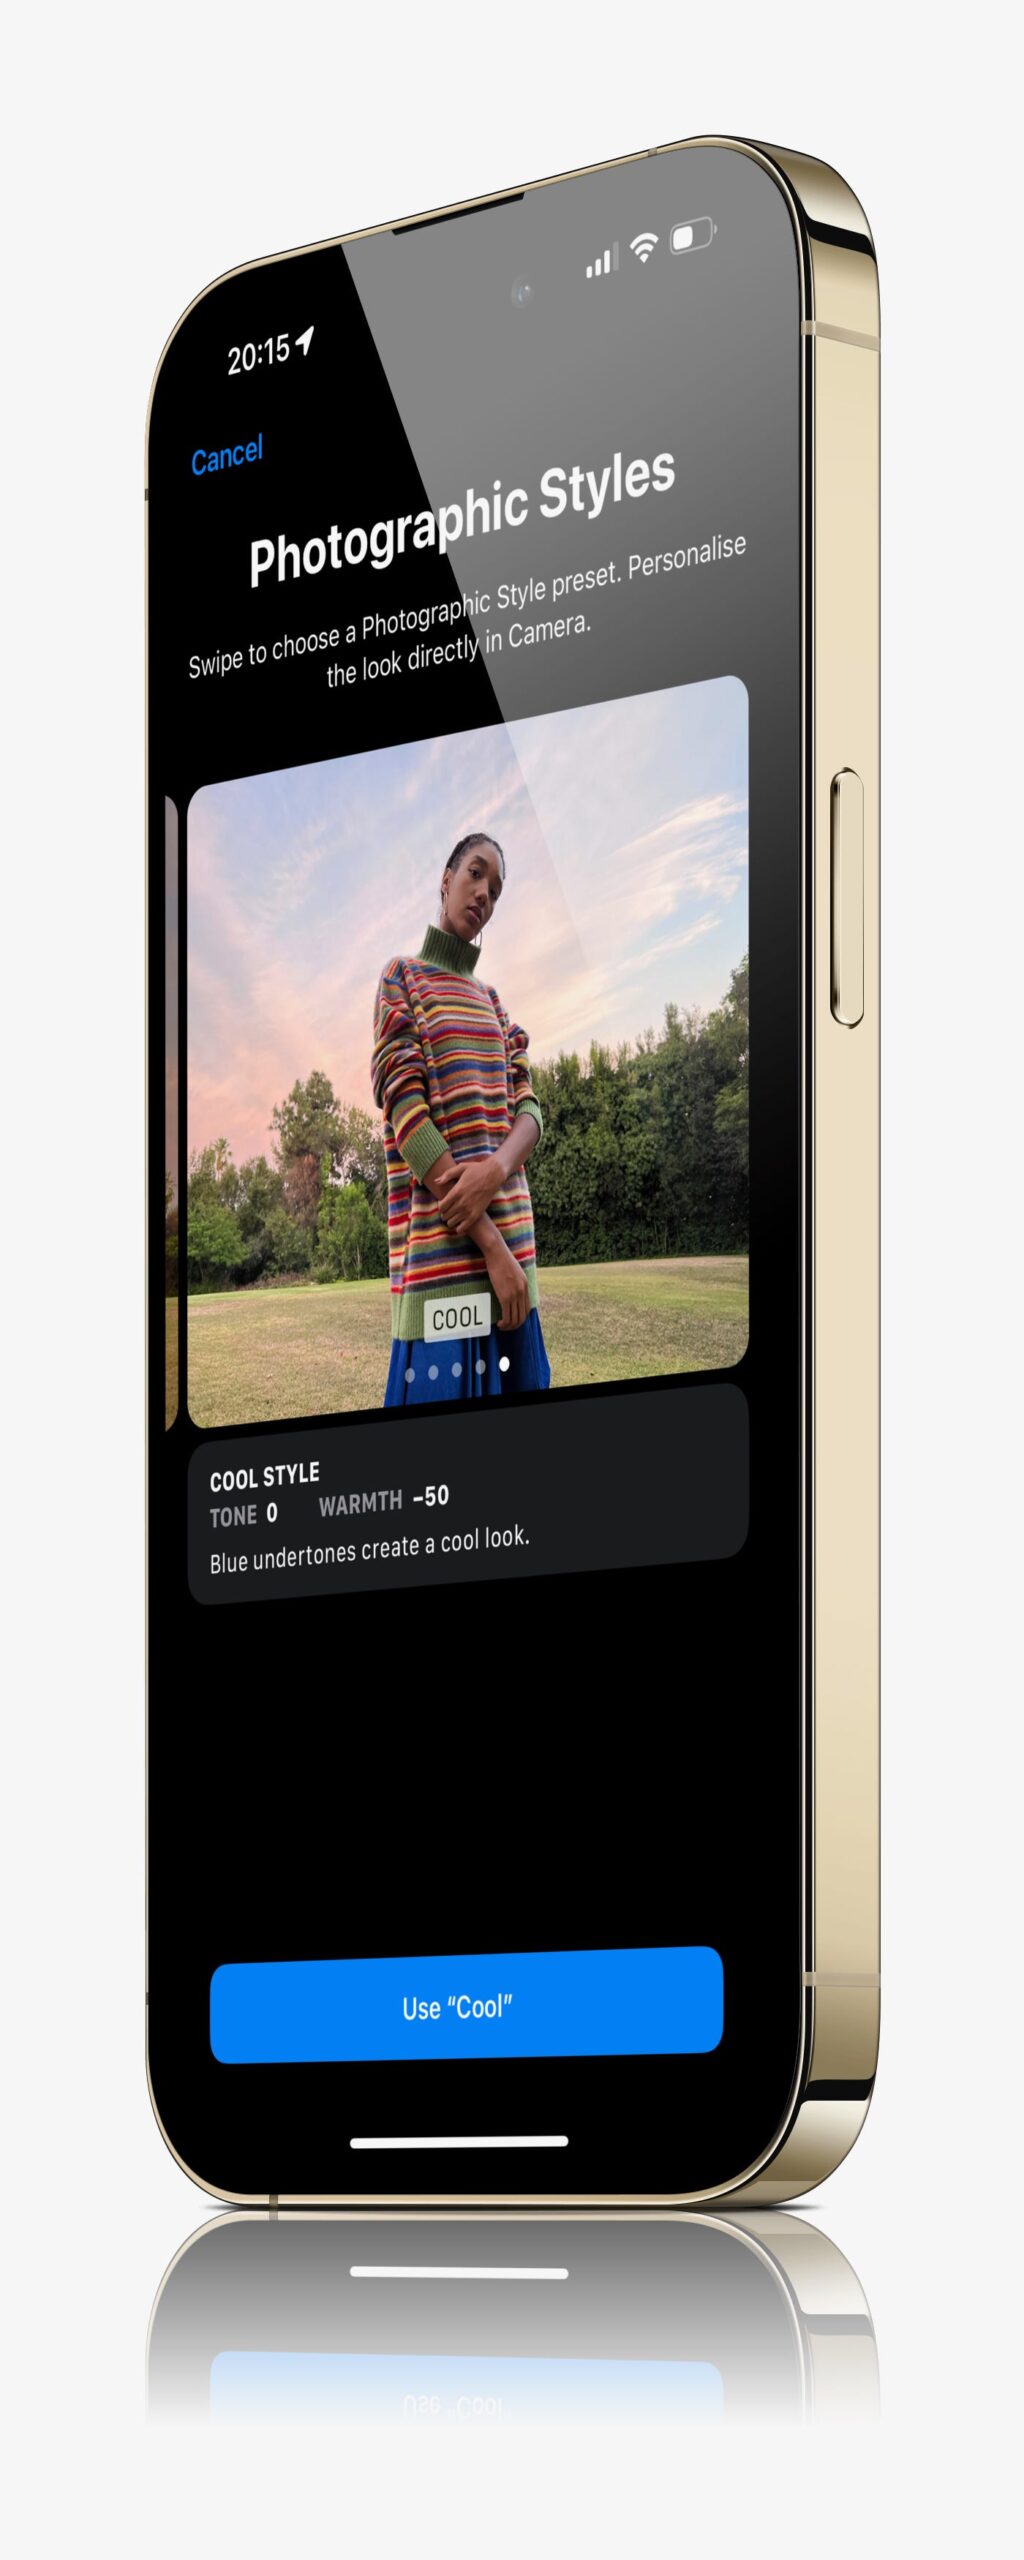
5. Camera Presets
If you have an iPhone 13 or later you get the ability to choose photographic styles. If you don’t want to be bother with editing photos these presets can help you apply styles when you take a photo.
You can choose your style in the Camera app or go to Settings, then Camera. then Photographic Styles.
6. View Outside Frame
If you have an iPhone 11 or later the Camera User Interface will show you content outside the frame to show what you can capture using another lens with a wider field of view.
This is turned on by default and I personally like to keep it that way. But it can get distracting at times and if it does you can turn it off in Settings. Camera, and then turn off the toggle for ‘View Outside the Frame’
7. Lens Correction
If your phone model has an ultra-wide camera, Lens correction is turned on by default.Lens correction can help offset any distortion or darkening found on the corners of the photos taken using the Ultra-Wide or the front lens.
But sometimes you might want to turn this off and be creative with your photos
Go to Settings, Camera, and then turn the toggle on/off for ‘Lens Correction’ and try it out!
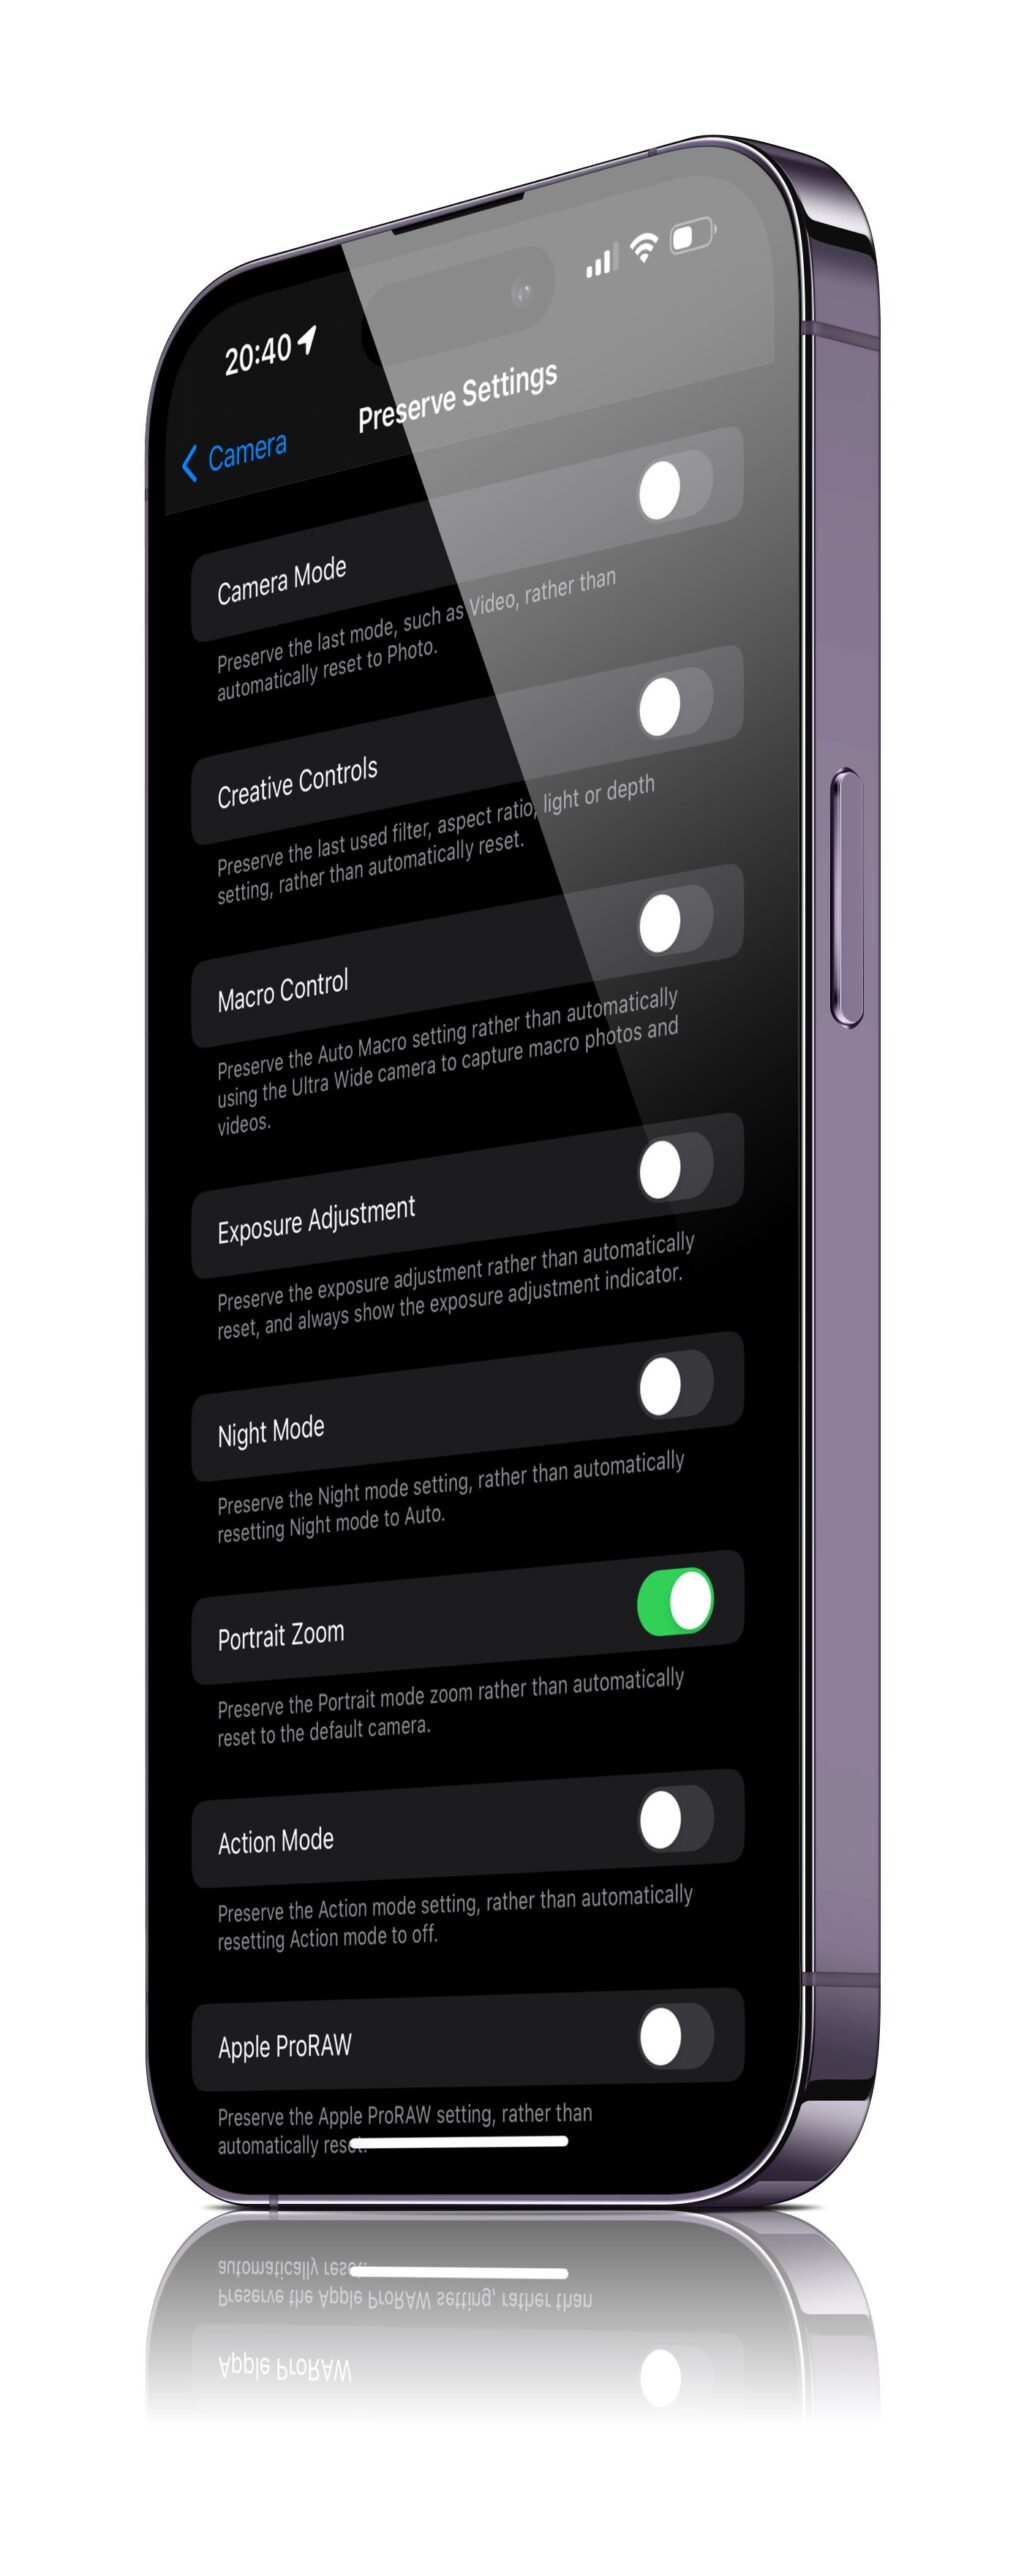
8. Preserve Settings
Every time you close the camera app the settings are reset, but if you want to keep them you can manually configure which settings to preserve.
Go to settings, camera, preserve settings and select which options you want to keep the same settings every time you open the Camera app.
Knowing these settings and changing them to your preference can give you more control whilst taking photos. Remember, photography is mostly about experimentation, and experimenting with a few settings can make you a better photographer and also maybe understand what kind of style you like
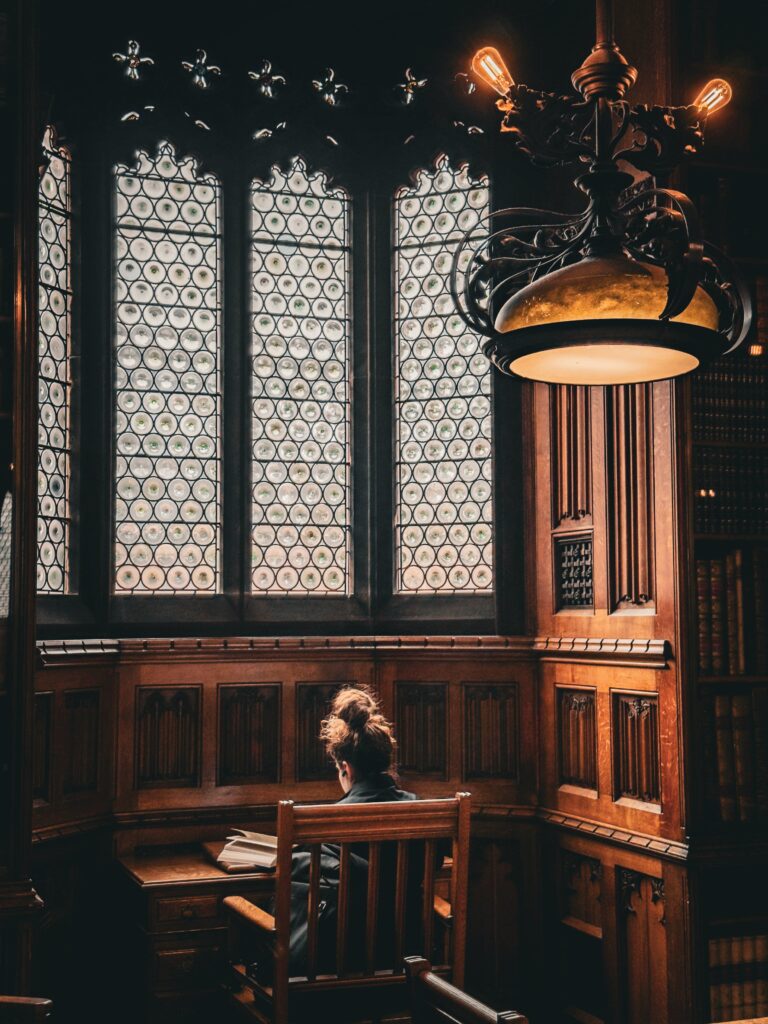
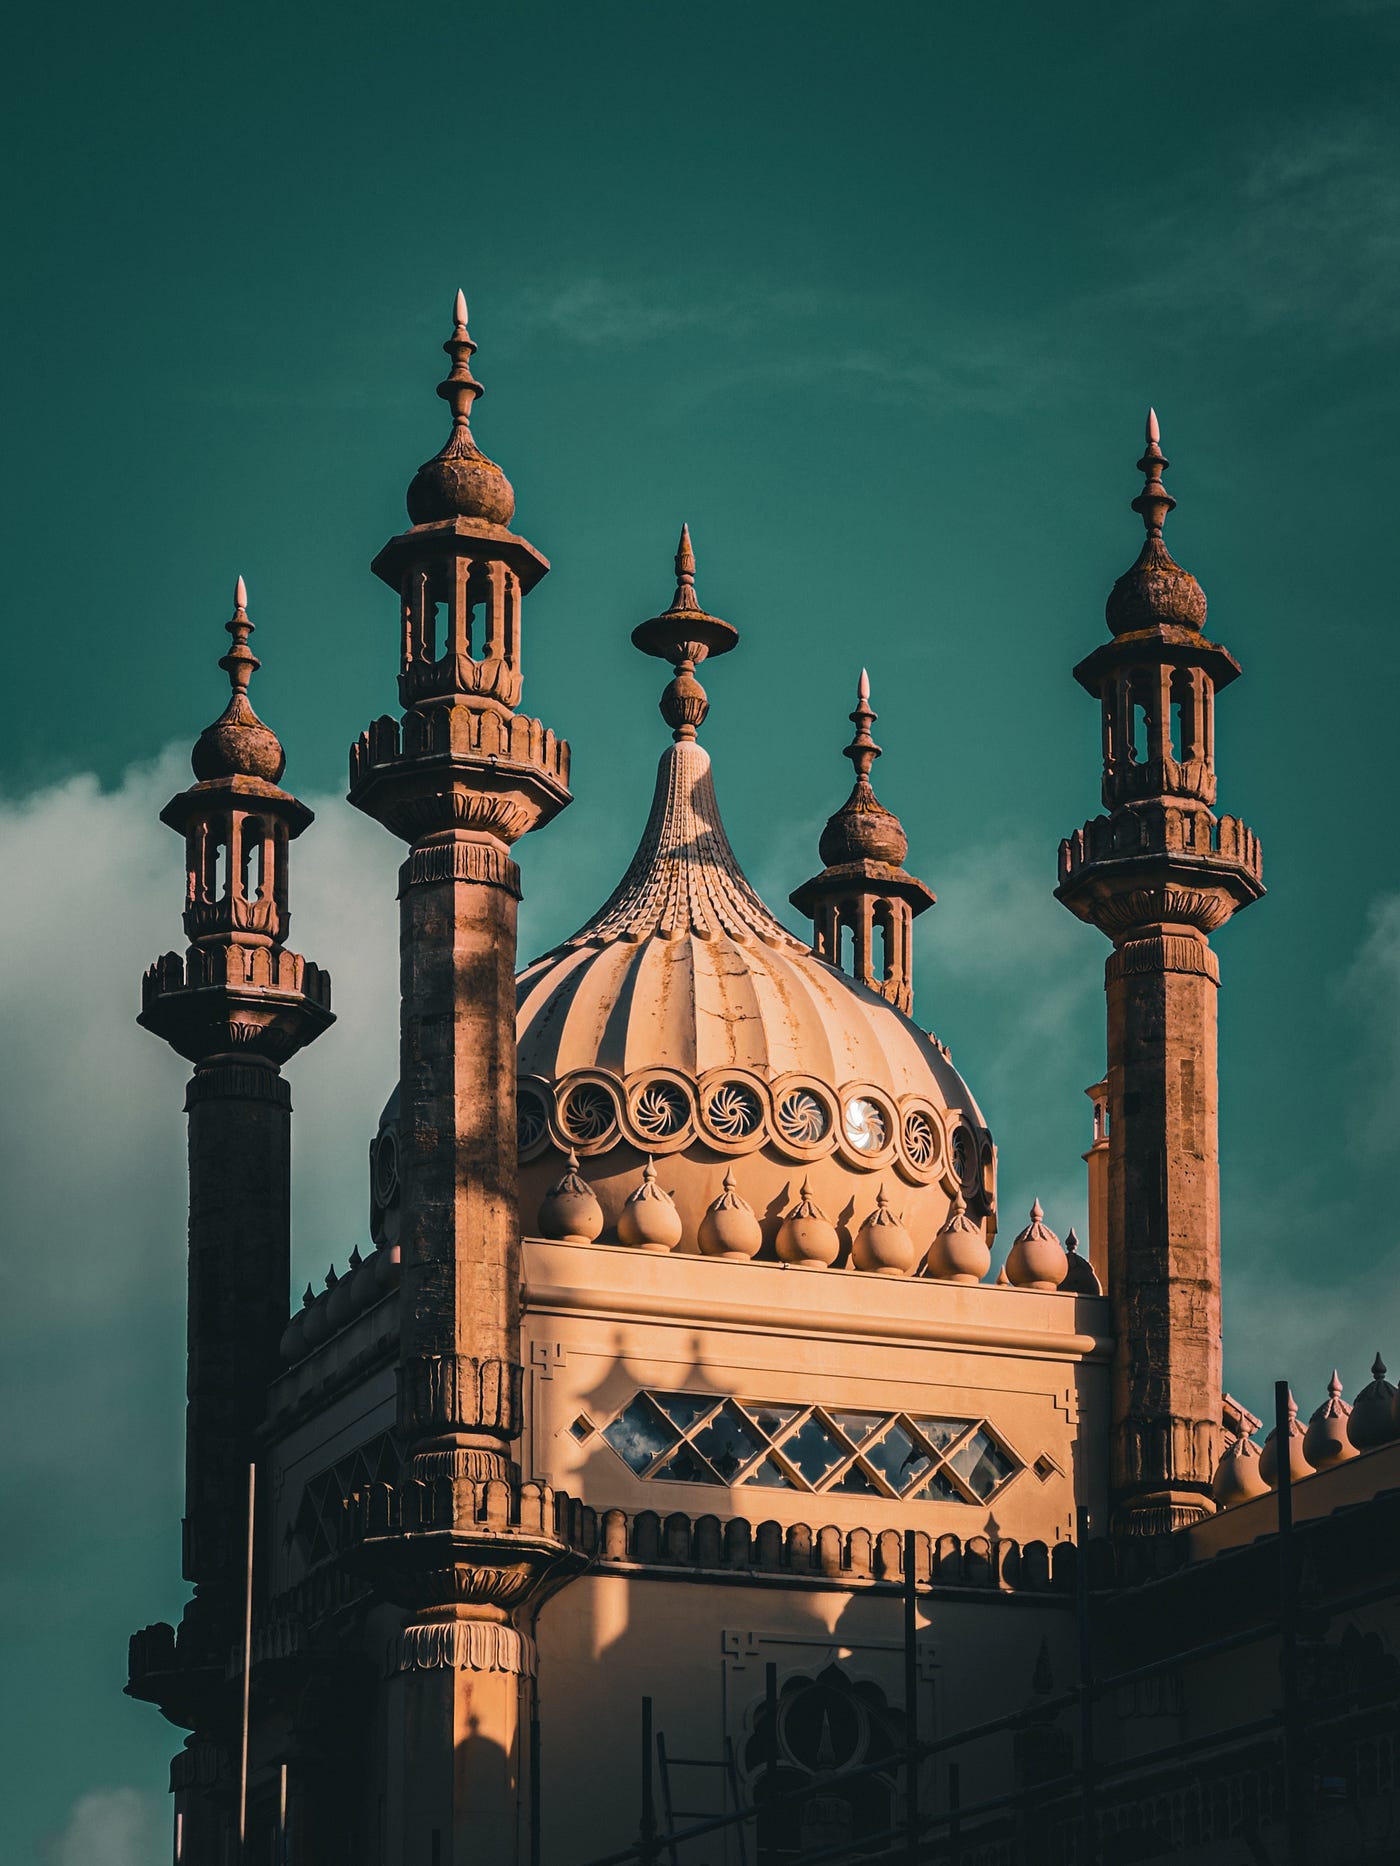
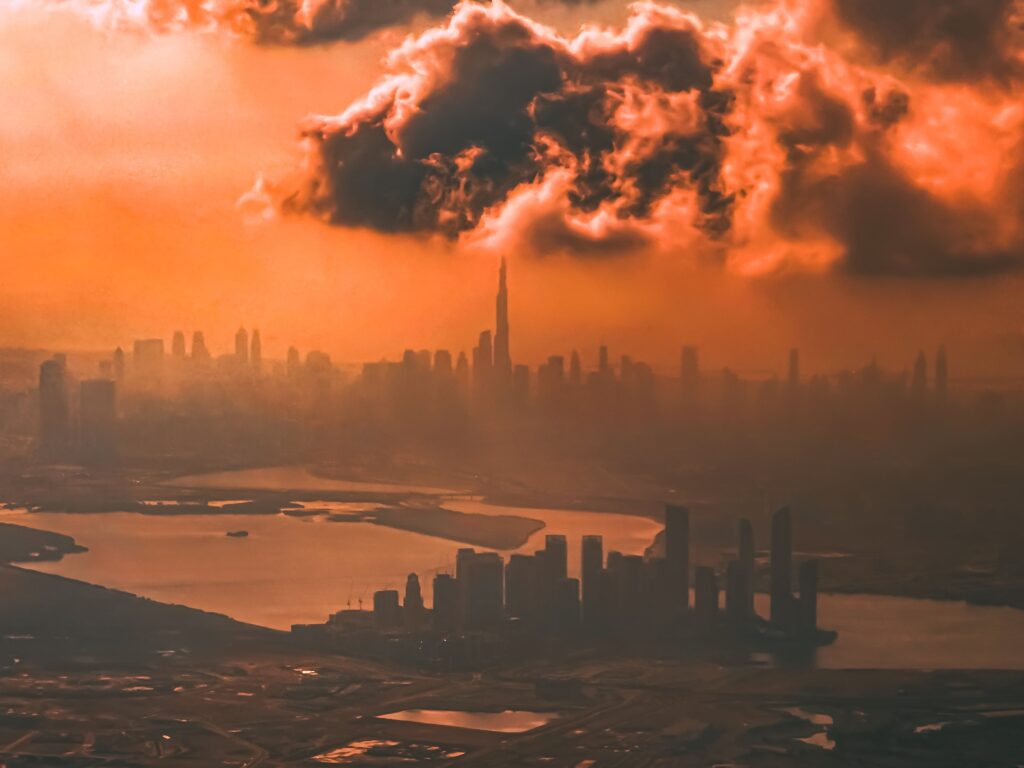
Every single photo you see on this post has also been edited, and that’s part of photography too. Some of these settings can give you even more flexibility when editing photos (especially the one that enables ProRAW). So feel free to play with these settings and see what works out.
If this has been helpful, I’ll leave you with a few photos I have taken on my iPhone; and my links to Instagram and Facebook where I post my photos (and also guides like this).